I´ve been asked several times by beginners web designers how to upload their website to the server – once they´ve got their site ready on their local machine.
This tutorial will guide you step by step through the proces of making your site visible to the world.
Before you start reading this tutorial you have to make sure that you already have a hosting and domain name assigned to it. If you haven´t got any of these yet – contact us and we will be happy to assist you with it.
To upload your site to the server we will need some FTP application. There are many different options, but the one we´ll be using in this tutorial is the FireFTP – free plugin for Firefox created by Mime Čuvalo.
To install FireFTP, launch Firefox and to to Tools > Add-ons (Fig. 01).

Fig. 01
In the new dialog window click in the Browse All Add-ons link (Fig. 02).
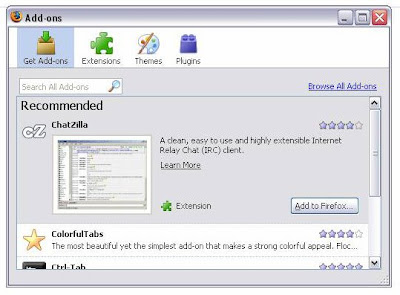
Fig. 02
This will launch the new page with the add-ons for firefox.
Using the search engine, search for fireftp (Fig. 03).

Fig. 03
The first position you should see is the FireFTP which we are looking for (Fig. 04). Click on the Add to Firefox button.
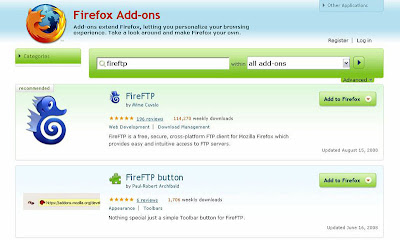
Fig. 04
In the new dialog window click Install Now button to begin installation (Fig. 05).

Fig. 05
This will install the FireFTP plugin in your Firefox browser (Fig. 06).

Fig. 06
Once the installation is finished click the Restart Firefox button to restart the browser (Fig. 07).

Fig. 07
After browser has restarted, go to Tools and select FireFTP (Fig. 08).

Fig. 08
This will launch FireFTP (Fig. 09).
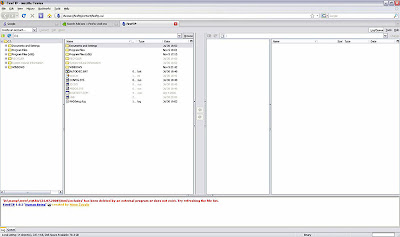
Fig. 09
Click on the Create an account dropdown menu. This will open the new dialog window (Fig. 10).

Fig. 10
Here you will be typing the FTP details you have been given from you web hosting company. If you haven´t got it, you will need to contact them and ask to send you all these details.
For the Account Name type anything you´d like – this is just for you to recognise the specific account.
For the Host type the Host name or IP address of your host – it usually is something like &ftp.mydomain.com&.
For the Login type your login and for the Password type your password.
Now you can click the OK button.

Fig. 11
Now, with your new site´s connection selected in the dropdown menu click the Connect button. This will open the connection to your server – you will see all relevant folders in the right hand side window (Fig. 12).
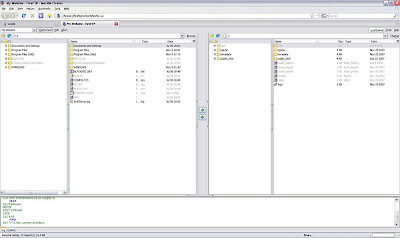
Fig. 12
Different hosting companies have different structure of the folders. The most common root folder names (folder where you will be loading your website files) are:
- public_html
- httpdocs
- www
In this case it is public_html.
Click on the plus sign nex to this folder to expand it. You should see one or several files which are displaying the current content under your domain (Fig. 13).
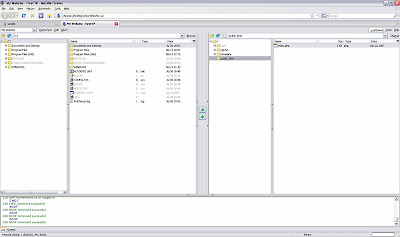
Fig. 13
Remove all of these files before you will start uploading your site to the server.
In the left hand side window you see your local folders. Click on the Browse button (Fig. 14), navigate to the folder where you store your website files and click the OK button (Fig. 15).

Fig. 14

Fig. 15
Select files related to your website in the left window and click the right arrow to copy them to the public_html folder on your server (Fig. 16).
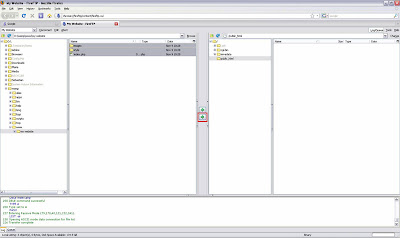
Fig. 16
Once transferred, you should see all your files in the public_html folder on your server (Fig. 17).

Fig. 17
You can now launch your browser and go to your website by typing your domain name in the URL field. You should be able to see your site now (Fig. 18).

Fig. 18
The second part of this tutorial shows how to upload MySQL database to the remote server.
Prepared by Web Design Tutorials :: Sebastian Sulinski.


